Below are the steps local IT support must take in order to join the IBM BigFix community at USC.
Process for requesting BigFix
To order BigFix, complete the following:
- Navigate to https://my.sc.edu and click on "Purchase computer software" under the "Personal" section.
- Select "Security" -> "BigFix Subscription" -> "BigFix Patch Client Device (Client Subscription).
- Enter the number of client licenses for your department / college and click "Continue".
- Complete the form on the Purchase Details page and click "Continue".
This generates an order and a ticket that is routed to the BigFix Administrator within the Division of Information Technology.
You will receive an email from the BigFix administrator with an introduction that includes the following:
A link to a Microsoft OneDrive share containing the BigFix client installer for Windows (both an MSI and a standard Setup.exe) or OSX and instructions on how to install and configure the client on a “gold image”.
You can install the BigFix client manually by running the Client installer on each computer. Use this method to install the client on a small number of computers. Run this sequence of steps to run the client installation:
- You can install the client using one of the following methods:
- Log on to the computer with administrator privileges and copy the Bigfix archive containing the setup.exe, masthead.afxm, and clientsettings.cfg to the local computer (C:\temp).
- After you have copied the Client folder to the target computer, double-click setup.exe from that folder to launch the installer.
- After the welcome panel, you are prompted for a location to install the software. You can accept the default or click Browse to select a different location.
- After the files have been moved, click Done to exit the installer. The BigFix Client application is now installed and will automatically begin working in the background. Repeat this process on every computer in your network that you want to place under BigFix administratio
You can use the Microsoft Installer (MSI) version of the client to interpret the package and perform the installation automatically. The MSI is available from your Bigfix administrator and is provided as a part of the on-boarding process.
To install the Windows client perform the following steps:
- Copy the BigFixAgent.msi program to a folder (c:\temp) of a Windows system.
- Run the BigFixAgent.msi program in one of the following ways:
- msiexec.exe /i c:\<folder name>\BigFixAgent.msi /qn
The /qn command performs a silent installation.
- msiexec.exe /i c:\<folder name>\BigFixAgent.msi /qn
To install the Mac client perform the following steps:
- Download the corresponding BigFix client package file to the Mac computer. This is provided by your Bigfix administrator or network administrator.
- Copy the PKG file to any directory and copy the masthead file for your deployment into the same directory. Ensure that the masthead file is named actionsite.afxm.
- You might optionally include a pre-defined settings file (clientsettings.cfg) in the same directory as the PKG file and the actionsite.afxmfile, to create custom settings for the Mac client at installation time. The Client PKG, actionsite.afxm, and clientsettings.cfg are provided by your Bigfix or Network administrator.
- Launch the PKG installer by double-clicking the PKG file (such as BESAgent-9.5.xxx.x-BigFix_MacOSXxx.x.pkg) and run through the installer. The agent starts up after the installation completes as long as the masthead file is included in the installation directory.
The Bigfix administrator will prepare a “custom site” for the requesting college/department that will act as a shared repository for devices and content. The naming scheme for the site is based on the conventions derived from the USC DS Active Directory. Devices and content within a departmental site are only accessible to operators authorized by the requesting network administrator and the Bigfix administrator.
- The computers on which the Bigfix client is installed will appear as a “subscribed computer” within the departments’ site based on a predefined set of criteria. These basic filters always include devices within the root of your organizations Active directory OU, and/or computer naming convention (eg. Coutsd, cocasl, comath etc.), and/or a "CID" (computer identifier) designated in the clientsettings.cfg.
An administrative role is created to match the site name and users are assigned the role by AD security group or LDAP user names. Members of this group will have authority over the devices within the site. These permissions may be granularly assigned, these details may be discussed with the Bigfix administrator to provide a management environment that best fits the needs of the requestors department.
An additional role is created by the BigFix Administrator for the Bigfix Web Reports web site based on the above criteria. Web reports is a separate interface accessible from https://bigfix.uts.sc.edu., and is the place for creating and scheduling reports the results of which are based on analyses created within the Bigfix environment.
The process concludes with an introduction to the Bigfix console and a basic overview of the patch management and software distribution functionality conducted by the Bigfix administrator or designated trainer. This introduction is presented via Bomgar, and conference call with a preference for administrators having access to the console on their own computers so they may step through the process with the instructor.
Learn more
You can use the Client Deploy Tool (CDT) to install Windows, UNIX and Mac target computers.
Client Deploy Tool: Recommended scenarioThis scenario describes the recommended steps to install and use the Client Deploy Tool in your environment. The scenario is supported both if you have a BigFix Windows or Linux server.
From the BigFix console, perform these steps:Install the Client Deploy Tool on target computers of your environment. Typically, one or more systems with the appropriate firewall / permissions necessary for software distribution.
Fixlets and Tasks are central to BigFix. Using Relevance statements, they target specific computers, remediating only those BigFix Clients affected by an issue. They are both packaged with an Action script that can resolve the issue with a simple mouse-click.
Fixlets and Tasks differ mainly in how they get resolved.
- A Fixlet is triggered by a Relevance clause that detects a vulnerability. When an Action is invoked to remediate the vulnerability, the Fixlet automatically loses relevance and is thus no longer applicable on that specific BigFix As a Fixlet Action propagates through your network, you can track its progress with the Console, Web Reports, and the Visualization Tool. When every BigFixClient in your network has been remediated, the Fixlet is no longer relevant and it is removed from the list. If the issue returns, the Fixlet is shown again in the list, ready to address the issue again.
- A Task comes with one or more Action scripts that allow an administrator to deploy software, adjust computer settings or run maintenance tasks. It generally stays relevant after its Action script has been run. Tasks are designed for reapplication and as a consequence, they are often persistent.
- Both Fixlets and Tasks might have a Default Action, allowing you to simply click from the list to deploy it. They can both be grouped
into Baselines, allowing higher levels of automation. If you create a Baseline of
Fixlets or Tasks which all contain default Actions, you can turn the tedious chores
of maintaining a corporate policy or common operating environment into a single-click
operation. In typical operation, Fixlet relevance contributes to the overall baseline
relevance; Task relevance does not. Similarly, Actions created from a Baseline can
be composed of both Fixlet and Task Actions, and typically only the relevance of the
Fixlet Actions contributes to the decision to run the group. These are defining features
of Fixlets and Tasks. The following table summarizes the differences:
Fixlet Message Task Relevance interpretation: Machine is in remediable state Action is available to run in this context To establish success of remediation: Relevance becomes false Action runs to completion Contributes to Baseline Relevance? Yes No Contributes to Group Action execution? Yes No
At any time, you can open a Fixlet or Task to inspect the underlying Relevance expressions that are used to target the Clients, as well as the Action scripts that are designed to address the issue. The language is human-readable to give you a high degree of confidence in both the applicability of the trigger and efficacy of the remedial Action. You can also see exactly which computers in your network are affected by each Fixlet or Task. When propagated, you can then view the progress and ultimate history of each Action taken on a Client-by-Client basis.
Learn more about creating and deploying custom fixlets.
Uninstall BigFix client software on Windows
- Open Control Panel and click Programs and Features.
- In Programs and Features, select IBM BigFix Client from the list and then click Uninstall.
Note: If you are sure BigFix is installed on your computer but it's not displayed in the list of programs, run the IBM BES Remove Utility listed at the end of this procedure.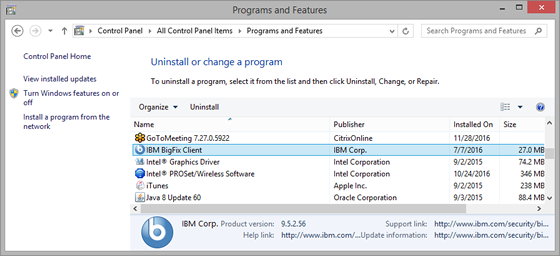
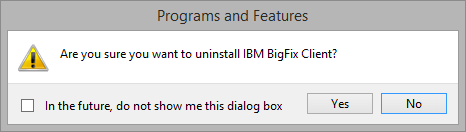
- When asked if you want to uninstall IBM BigFix Client, click Yes.
- When the process completes, close the Programs and Features control panel, save any work you have open, and then restart the computer.
If you have any issues uninstalling the IBM BigFix Client, you can download and run the IBM BES Remove Utility.
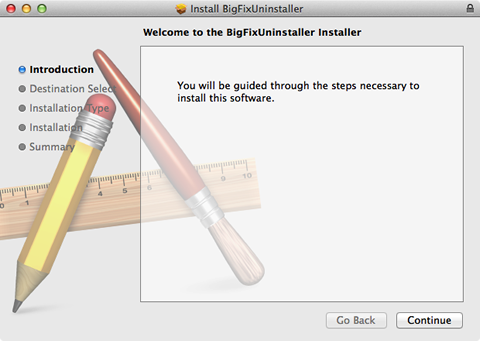
Uninstall BigFix client software on a Mac
- Download the BigFix Uninstaller for Mac.
- Double-click the BigFixUninstaller.pkg icon in the disk image window. (Depending on your browser, you may need to double-click the downloaded .dmg file to open the disk image window.)
- When the Welcome screen appears, click Continue.
- Click Install.
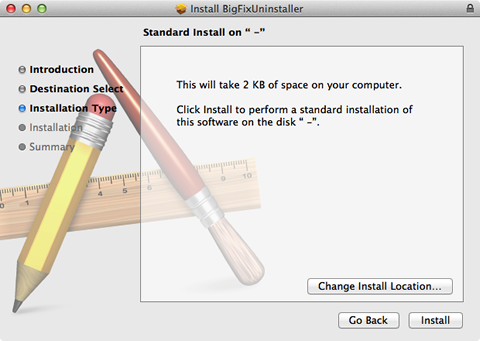
- When prompted, enter your computer administrator name and password and click Install Software.
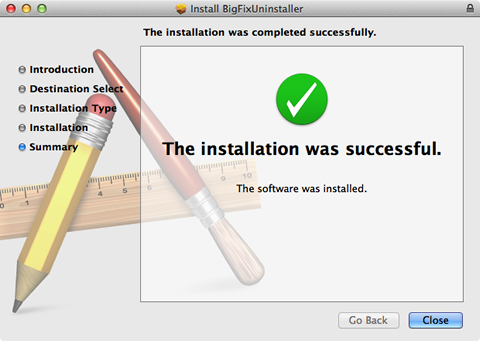
- After BigFix has been removed from your computer a screen saying that the installation
was successful displays. Click Close.
After uninstalling the BigFix client, you will see no obvious sign that anything has happened. If you want to verify that BigFix is removed, navigate to Applications > Utilities > Activity Monitor. Check that BESClientUI does not appear in the list of processes.
Complete BigFix Operators Guide
BigFix Glossary of Terms